Author: bdazlai – Make it personal.

  • Flawless at 50+: Your Friendly Guide to Makeup That Glows with You

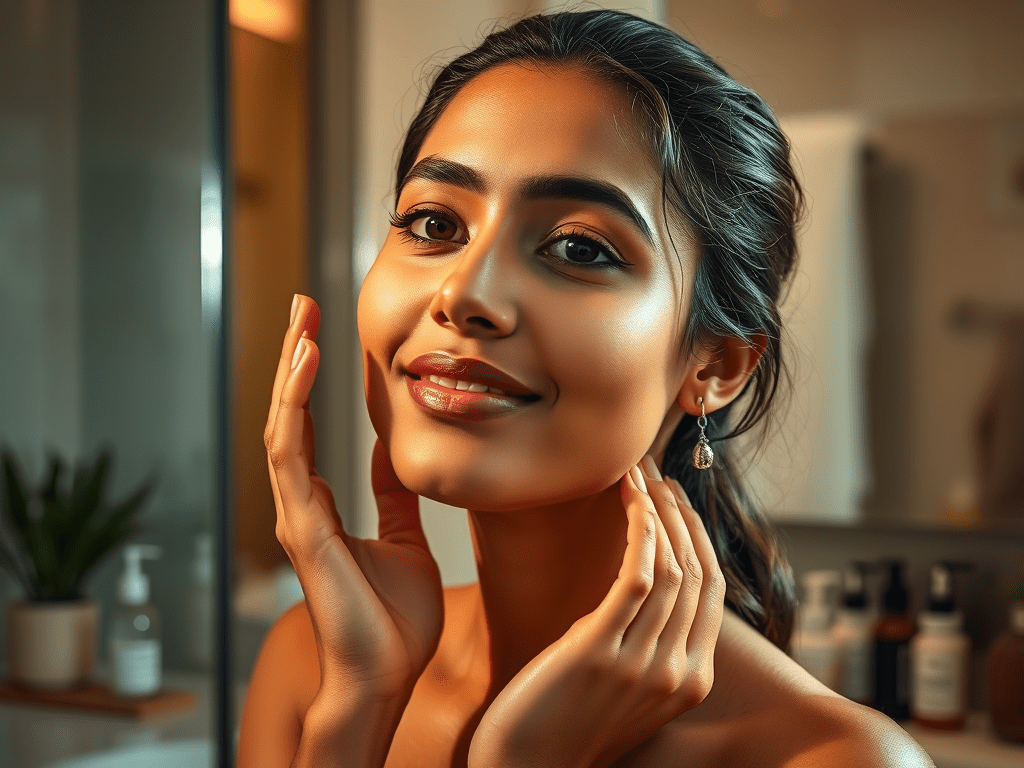
    Let’s be real — turning 50 isn’t the end of anything. It’s the beginning of a new era — one where we get to redefine what beauty means on our own terms. For me (and maybe for you too), it was about choosing self-care, confidence, and joy over chasing youth.

    Sure, our skin changes a little. Maybe we’ve earned a few more lines from smiling too hard or staying up too late dancing or taking care of everyone else. But that doesn’t mean we stop wanting to look fresh, glowing, and — yes — beautiful.

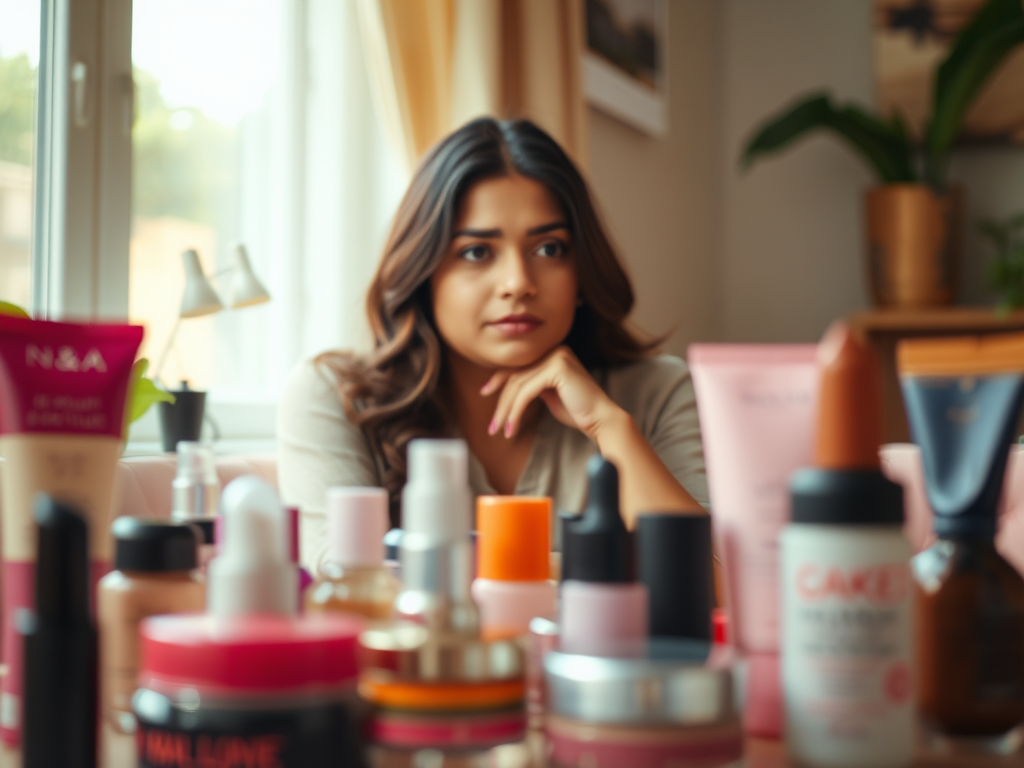
    So here it is, my no-fuss, no-fluff guide to the best makeup for mature skin, built around one goal: helping you feel like you, just more radiant.


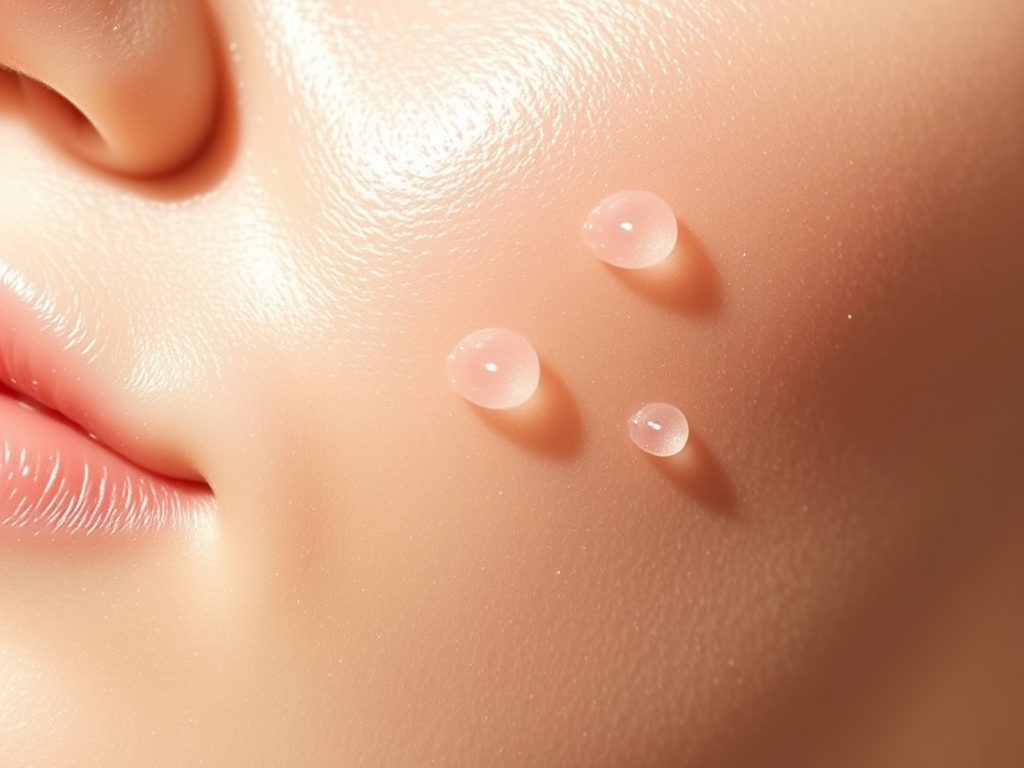
    Start With Skin That Glows

    If I’ve learned anything about makeup over 50, it’s that hydration is everything. Before anything goes on my face, I reach for a skin cream packed with hyaluronic acid, ceramides, and maybe a little peptide love. It makes my skin feel smooth, plump, and ready for the day.

    A velvety primer with silk proteins or green tea extract helps everything stay in place and gently softens the look of fine lines. And please don’t skip SPF — a broad-spectrum sunscreen with niacinamide keeps my skin safe and even-toned.

    Friendly tip? Show your neck and chest some love too — a firming cream with plant-based antioxidants can make all the difference.


    Face It, But Keep It Light

    You don’t need layers of foundation. In fact, that can actually make skin look older. Instead, I reach for a tinted moisturizer with SPF 40 that gives me that “I drink water and mind my business” kind of glow. Look for skin tints with aloe vera or non-nano zinc oxide — they feel light, protect your skin, and even out tone without masking it.

    Dark circles or redness? A creamy color corrector with vitamin C and caffeine brightens up tired areas without creasing. Follow it with a hydrating concealer containing squalane or glycerin to keep things smooth and seamless.


    Creamy Color Is Your New Best Friend

    Say goodbye to powdery blush that sits on top of your skin. A good cream blush for older women blends right in and looks like a natural flush. I love ones that include niacinamide, jojoba oil, or shea butter — they add color and moisture in one go.


    Brighten the Eyes (Gently)

    As much as I loved my winged eyeliner days, now I go for something softer. A gel eyeliner with vitamin E glides on without tugging and gives just enough definition without looking too harsh.

    For shadow, a cream stick with hydrating waxes and a little shimmer can brighten up your lids — especially in shades like soft taupe, bronze, or rose gold. Add a lengthening mascara with panthenol and biotin, and you’re golden.


    Brow Love is Real

    One of the sneakiest changes after 50? Thinning eyebrows. But don’t worry — the right brow gel with vitamin B5, beeswax, and plant extracts can fluff them right back up. Or, grab a pencil with castor oil to add definition while encouraging growth.

    Want a soft, everyday look? Try a natural brow powder for that fluffy, filled-in feel.


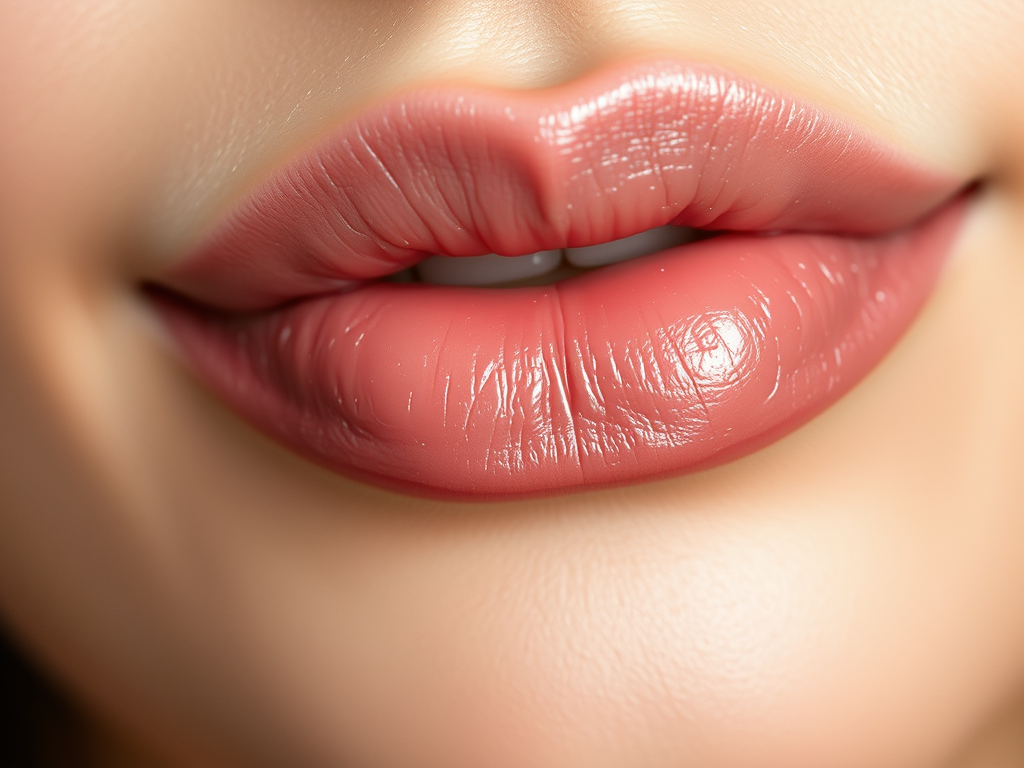
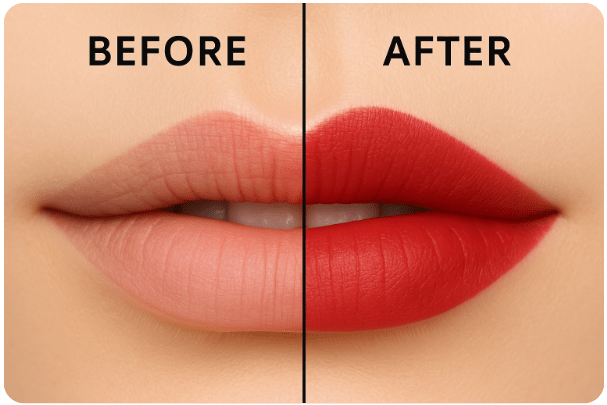
    Lips That Shine Without the Lines

    I don’t know about you, but I’ve retired matte lipsticks. They look great — until they settle into fine lines. These days I’m all about tinted lip balms, lip oils, and plumping glosses with peptides, shea butter, and hyaluronic acid. They give me just enough color and keep my lips feeling soft and full.


    Real Talk: Makeup Tips That Matter Over 50

    • Less is more: Focus on glow, not coverage.
    • Hydration is your hero: Use skincare-infused makeup to nourish as you go.
    • Choose cream formulas: They’re kinder to skin and give a natural finish.
    • Frame the face: Soft brows and gentle eyeshadow bring balance.
    • Play up what you love: Got gorgeous eyes? Lush lips? Highlight them!

    You Deserve to Shine — Always

    Being over 50 doesn’t mean hiding — it means celebrating. Every laugh line? That’s a story. Every shift in our skin? A reminder of everything we’ve seen, loved, survived.

    Makeup isn’t about masking who we are — it’s about honoring it. Whether you’re heading out for brunch, Zooming with the grandkids, or just looking in the mirror and smiling at yourself, you deserve to feel beautiful, confident, and alive.

    So let’s keep glowing — one creamy blush, one SPF-packed tint, one hydrating gloss at a time.

  • Understanding All About Hair Dye: Permanent vs. Semi-Permanent

    Ever wondered what exactly goes into your hair color or why some dyes last longer than others? Here are some intriguing and practical insights about hair dyes that might surprise even seasoned hair enthusiasts!

    1. Permanent vs. Semi-Permanent: More Than Just Longevity

    Did you know permanent dyes penetrate deep inside your hair by opening up your hair’s cuticles with ammonia and hydrogen peroxide? That’s why they cover grays so effectively but also why they’re harsher on your strands. Semi-permanent dyes, on the other hand, gently coat your hair without penetrating too deeply, making them less damaging but short-lived.

    2. Those Mysterious Color Codes Explained (CI Numbers)

    Ever seen a hair dye box with “CI 19140” or “CI 60730” and wondered what they mean? These are Color Index (CI) numbers that clearly identify dyes. CI 19140, for instance, is Tartrazine (Yellow 5), known for vivid yellows but also as a potential allergen. CI 60730, Acid Violet 43, is the secret behind your purple shampoo that neutralizes brassy tones.

    CI numbers fall into different categories:

    • Synthetic Dyes: Chemically derived, often petroleum-based, offering vibrant, long-lasting colors but higher risk of allergic reactions or sensitivities.
    • Natural Dyes: Derived from plants, minerals, or other natural sources, usually gentler and less likely to cause allergies. However, color intensity may be less vibrant or shorter-lasting compared to synthetics.

    3. Hair Dye Ingredients Can Affect Your Health

    Ingredients like Paraphenylenediamine (PPD), common in darker permanent dyes, can cause severe allergic reactions. Always doing a patch test 48 hours beforehand isn’t just precautionary—it’s crucial! Surprisingly, some “natural” dyes contain insects—CI 75470 (Cochineal) comes from crushed beetles, giving products a natural red tint.

    4. Expired Hair Dye: Why Risking It Isn’t Worth It

    Expired dyes don’t just lose potency—they become chemically unstable. They can cause unexpected color results, uneven application, or even severe scalp reactions. Check your dye for odd smells, leaks, or separation—clear signs it’s time to let go.

    5. Clever Tricks to Make Your Hair Color Last Longer

    Want vibrant hair longer? Beyond color-safe shampoos, avoid washing your hair too often. Excess water and heat styling are your dye’s worst enemies. Regularly use deep conditioners, keep heat-styling minimal, and always protect hair from the sun and chlorinated pools.

    6. Hidden Environmental Impact

    Did you know rinsing hair dye down the drain impacts aquatic life? Certain synthetic dyes break down slowly and pollute waterways. Opting for dyes with fewer harmful chemicals isn’t just healthier for you—it also helps protect the environment.

    7. Healthy Hair Practices BEFORE Coloring

    Avoid washing your hair right before coloring—it removes natural oils that protect your scalp from irritation. Skip heavy styling products to let the dye penetrate evenly.

    8. Surprising pH Role in Hair Dyeing

    The effectiveness of your dye heavily depends on its pH. Higher alkaline levels (found in permanent dyes) raise the hair cuticle, helping color molecules enter deeply, but at the expense of hair health, causing potential damage and brittleness.

    9. Why Does Hair Become Dry and Frizzy After Dyeing?

    Hair dyeing, especially with permanent dyes, strips natural moisture and oils, weakening the hair structure. The chemicals in dyes lift cuticles, leaving strands vulnerable to dryness, breakage, and frizz. That’s why aftercare, including deep conditioning and moisturizing treatments, is essential.

    10. How to Identify Safe CI Numbers:

    When selecting hair dyes, consider:

    • EU and FDA approved lists: Ensure products comply with regulations, controlling dye concentration for safe usage.
    • Avoid controversial dyes: Skip CI 19140 (Tartrazine) if you have sensitive skin or known allergies.
    • Patch test: Always conduct an allergy test 48 hours before using a new dye.

    11. How to Select a Safe Dye: What to Look For

    • Choose dyes clearly labeling all ingredients, including CI numbers.
    • Prefer dyes marked as hypoallergenic or dermatologically tested.
    • Select products free from ammonia, PPD, and resorcinol if you have sensitive skin.
    • Look for brands offering natural or plant-based ingredients, as they are typically gentler.

    Continuous use of hair dye can lead to a range of issues including hair damage, as the harsh chemicals strip natural oils, leaving strands dry, brittle, and prone to breakage. Over time, frequent dyeing can also cause color build-up, resulting in uneven tones, dullness, or muddy hues that are hard to correct. Additionally, repeated chemical exposure weakens the hair shaft and follicles, potentially leading to thinning or increased hair loss. The scalp may also become more sensitive or develop allergic reactions, especially to ingredients like PPD or ammonia, even if previous applications were trouble-free. Beyond surface effects, prolonged absorption of chemical compounds through the scalp raises concerns about chemical overload and its possible long-term health implications.

    Next time you color your hair, you’ll not only understand what’s happening but also appreciate the science and considerations behind every vibrant shade!

  • The World of Beauty Influencers: Are They Truly Worth Following?

    In the digital age, the personal beauty care sector has undergone a transformation, thanks in large part to AI skincare tools and beauty influencers. From AI face scan for skincare to customized skincare recommendations, the beauty landscape is shifting from one-size-fits-all marketing to hyper-personalized solutions. However, influencers still play a powerful role in shaping how consumers perceive and purchase beauty products. This blog explores their impact, the rise of AI-powered skincare recommendations, and whether influencer-driven choices are truly worth the hype.


    Beauty influencers are content creators who share makeup tutorials, ingredient safety checks, clean beauty recommendations, and non-toxic skincare product reviews across YouTube, Instagram, TikTok and more. Whether they’re doing skincare routine walk throughs or decoding product labels, they often become trusted sources for those searching for the best skincare for own skin. Their popularity stems from relatability, consistency and the illusion of personalization, which sometimes mimics what AI-powered beauty tools like bdazlai now offer more accurately.


    Estimated Number of Beauty Influencers on Social Media Platforms

    It’s tough to pin down exact numbers, but here are some estimates:

    • TikTok: Over 1.5 million beauty-focused followers in the U.S. alone
    • Instagram: Tens of thousands of micro and macro beauty influencers worldwide
    • YouTube: Some Beauty content creators boast tens of millions of followers

    From nano creators to celebrity-tier influencers, the beauty content ecosystem is massive and influential—especially in regions like India where AI-powered clean beauty platform searches are growing.


    • Paid Partnerships: Influencers receive direct compensation to feature skincare and makeup products. Brands often provide guidelines and expect results in visibility or sales. These are usually marked with hashtags like
    • Gifted/Unpaid Collaborations: Brands send free products in exchange for potential mentions or reviews. While influencers aren’t obligated to post, they often do—especially when building trust or trying to gain more brand collaborations.

    The transparency of paid promotions is now scrutinized closely, which is why platforms like bdazlai include ingredient safety checker features to provide unbiased information about products.


    Influencers humanize beauty brands. When someone says, “This moisturizer saved my dry skin,” it sounds like advice from a friend. Even if labeled as paid, the emotional connection often overrides skepticism. This is especially impactful among those searching for skincare product analysis AI tools who may not yet be familiar with how to check if skincare is safe.

    • Impulse buys
    • Unrealistic expectations
    • Neglecting skin type analysis tool insights in favor of influencer hype

    1. Wasted Money: You may spend ₹500–₹5000 on a product that irritates your skin or clogs pores.
    2. Wasted Time: Weeks of testing ineffective skincare when AI skincare quiz results could’ve saved you time.
    3. Wasted Resources: Half-used bottles lead to product and environmental waste.
    4. Emotional Toll: Failure may hurt your self-esteem or skin confidence.

    Instead of trusting blindly, using tech-enabled beauty diagnosis tools like bdazlai’s ingredient analysis and smart skincare routine generator ensures informed decisions.


    No — and here’s why:

    • Biological Differences: Skin concerns (acne, wrinkles, hyperpigmentation and more) vary person to person
    • Climate & Lifestyle: An influencer living in a cold climate may have different skin needs than someone in tropical India
    • Technique & Routine: The product may not be the problem—it’s how it’s used

    That’s why AI-based beauty product recommendations work better. They factor in personal data and avoid the trial-and-error loop.


    Good When:

    • They’re transparent about paid partnerships
    • Promote non-toxic skincare brands or fragrance-free skincare products for sensitive skin
    • Educate about skincare ingredients like hyaluronic acid, niacinamide or retinol

    Platforms like bdazlai help bridge this gap by offering science-backed skincare recommendations.


    Beauty influencers aren’t inherently good or bad — they’re part of the evolving beauty ecosystem. When combined with AI-powered skincare recommendations and tools like bdazlai’s AI face scan for skin health, their advice becomes much more useful.

    If you’re wondering:

    • “Can AI make personalized skincare accessible to everyone?” → Yes, it already is.
    • “Does your skincare routine match your skin’s needs?” → Use bdazlai to find out.
    • “Is there a better way to shop for skincare?” → Definitely, with Bdazlai.

    Always ask: Is this ingredient safe for my skin? And let AI-backed tools answer that before the next #ad influences your wallet—and your skin.

    Unlike one-size-fits-all influencer recommendations, bdazlai takes a completely personalized approach to beauty. Using advanced AI face scanner, bdazlai analyzes your unique skin tone, skin type, hair texture and specific concerns like dryness, acne, dark spots etc etc. It then cross-checks this information with a vast ingredient database to recommend products that are actually suited for you — not someone else on the internet. Whether a product is recommended by an influencer or trending online, bdazlai helps you filter through the hype and focus only on what matches your real, personal profile. No more guesswork, no more wasted money or time — just science-backed, tailored solutions made simple.

    Follow us at www.bdazlai.com for personalized skincare powered by AI.
    Stay connected on Instagram, Facebook, and Twitter @bdazlai for tips, updates, and smart beauty insights!

  • Embracing the Double-Lined Lip: A Guide to Fuller, Softer Lips

    Discover the viral double-lined lip trend and how to care for faint lip borders using hydration, makeup tips, and nourishing ingredients. Embrace your natural lip shape! double-lined lips, blurred lip trend, lip liner tips, lip plumping makeup, Gen Z beauty, lip care routine, natural pout, dry lips makeup fix


    You’ve probably scrolled past it—those soft, diffused lips that feel almost airbrushed, yet somehow natural. That’s the double-lined lip trend having its viral moment, especially among Gen Z makeup lovers. But this isn’t just about aesthetics—it’s about reclaiming and enhancing something that once felt like a flaw.

    A double-lined lip happens when there’s a faint second border outside your natural lip line. It might appear with age, dehydration, or sun exposure—or you may have always had it. Rather than concealing it, makeup artists are now using strategic lining and blending to define and soften it. It creates a natural shadow and a more voluminous, blurred pout—without the harshness of overlining.


    Let’s break it down. That second line around your lips can form from a few things:

    • Dehydration or lack of regular lip care—leaving lips dull and lined.
    • Aging—with time, lips lose their plumpness and collagen, making the natural border less defined.
    • Sun damage—UV rays wear down the moisture barrier and create uneven texture.
    • Lip biting, smoking, or exposure to harsh weather—can worsen the visibility of lines.

    It’s super common. And honestly? Super fixable (and fabulously frameable) with the right prep and products.


    Before anything else, get that base smooth. Because a blurred, soft lip needs hydration and a supple surface.

    • Exfoliate Gently: Use a sugar-based lip scrub or just a warm, damp washcloth. Avoid gritty exfoliators—they can cause microtears.
    • Hydrate Deeply: Ingredients to look for in your lip balm:
      • Hyaluronic Acid – binds water to plump your lips
      • Shea Butter – rich in fatty acids, ultra-moisturizing
      • Squalane – lightweight hydration with a smooth feel
      • Ceramides – essential to restore the moisture barrier
      • Vitamin E – soothes, heals, and protects
    • Use SPF: Lip balms with sun protection prevent further collagen loss and pigmentation.
    • Primer Before Liner: A dab of concealer or lip primer prevents bleeding and sets the stage for precision.

    If you’re working with a faint second line—here’s your strategy:

    • Line the Inner Lip Border: Use a creamy, natural-toned lip liner to trace your actual lip edge—not the shadowed one.
    • Smudge Slightly Outward: Diffuse the line toward that second edge with your finger or a soft brush. It blends the two lines for a blurred look.
    • Apply Creamy Lipstick: Choose satin or hydrating formulas with mango butter, lanolin, or rosehip oil. These won’t settle into lines like matte formulas do.
    • Highlight the Center: A dab of gloss or highlighter on your Cupid’s bow and lower center lip pulls focus inward, softening any outer edges.
    • Set for Wear: Lightly blot, then dust with translucent powder or spritz a setting spray to lock in the look.

    Here’s what to look for in your makeup bag:

    • Hydrating Lip Liners: With jojoba oil, beeswax, or aloe vera to prevent tugging
    • Creamy Lipsticks: Infused with mango butter, rosehip oil, or lanolin for moisture
    • Glosses with Peptides: Can boost plumpness and fade fine lines over time
    • Anti-Aging Lip Treatments: Look for low-dose retinol or collagen-stimulating peptides to smooth and support lip texture

    Here’s the truth—your lips are gorgeous, and this technique isn’t about fixing, it’s about featuring. Whether your lipstick tends to feather or you’re craving a soft-focus finish, embracing the double line is about working with your face—not against it.

    And if you’re feeling creative? We’re seeing bold trends where people intentionally outline both lip borders for a 3D or ombré effect. It’s bold, it’s expressive, and yes—it’s kind of iconic.


    💬 Your Turn: Have you noticed a faint second lip line or struggled with lipstick feathering? What’s your go-to lip product combo? Drop your thoughts or tips in the comments!

    📲 Follow us on Instagram, Facebook, and Twitter for daily beauty inspo, ingredient tips, and honest skincare breakdowns.

  • Goodbye, Split Ends & Frizz! The Real Talk on Hair Health & Ingredient Heroes ✨


    💇‍♀️ When Hair Rebels: Let’s Talk Frizz, Dryness & Split Ends

    There’s nothing like waking up, running your fingers through your hair, and feeling… straw. Or worse—snapping ends and untameable frizz that refuses to cooperate, no matter how many serums you’ve tried. If you’ve felt personally victimized by humid weather or heat tools, you’re not alone.

    But here’s the thing—split ends, dry strands, and frizz aren’t just cosmetic issues. They’re your hair crying for help. And with a little know-how and some ingredient-loving care, that bounce and shine can come back.


    🔍 The Breakdown: What’s Really Going On?

    • Split Ends are tiny breaks at the end of your hair shaft—basically where the strand has given up after all that styling and snapping.
    • Dry Hair feels brittle and lacks shine because it’s missing natural oils and hydration.
    • Frizz happens when your hair’s outer layer—the cuticle—is raised, letting moisture in from the air and causing that puffball effect (especially in humidity!).

    🧪 Why Your Hair Might Be Acting Out

    Let’s face it—we put our hair through a lot. And it shows. Here’s what could be behind the damage:

    • Frequent heat styling (flat irons, curling wands, even hot air from your dryer 🔥)
    • Using sulfate-heavy shampoos that strip natural oils
    • Harsh brushing, especially when wet
    • UV exposure and environmental pollution
    • Color treatments and chemical relaxers
    • Hard water loaded with drying minerals

    🛡️ Prevention is Key, Always

    Taking care of your hair doesn’t mean quitting all your favorite styles—but small changes make a big impact:

    • Shampoo only 1–2 times a week to avoid over-drying
    • Sleep on satin or silk pillowcases to reduce friction
    • Limit heat tools and always use a heat protectant spray
    • Trim those ends every 8–12 weeks—your hair will thank you
    • Shield your strands from sun damage with UV hair mists or chic hats ☀️👒

    🌿 What Should Be In Your Hair Products?

    The products on your shelf matter. Look for these superstar ingredients:

    • Hydrating Boosters: Glycerin, Aloe Vera, Honey – lock in moisture and keep strands supple
    • Nourishing Oils: Argan Oil, Coconut Oil, Jojoba Oil, Sweet Almond Oil – rebuild the moisture barrier
    • Proteins: Hydrolyzed keratin, Silk protein, Egg protein – repair and strengthen the stratum corneum of the hair shaft
    • pH-Balanced Formulas: Help flatten the cuticle and seal in hydration

    🛑 Avoid: Sulfates, drying alcohols, and heavy silicones—they might make your hair look smooth at first but wreak havoc long term.


    🧴 Your Ideal Haircare Ritual 🧴

    • Start with a gentle, sulfate-free shampoo
    • Give a break from all styling and harsh products
    • Follow up with a rich, creamy conditioner
    • Use lukewarm or cool water to rinse (hot water = oil thief!)
    • After washing, pat dry with a microfiber towel or an old cotton t-shirt
    • Apply a leave-in conditioner or a light anti-frizz serum on damp strands
    • Once a week, treat your hair with a deep conditioning mask or a hot oil treatment

    🌱 Real Remedies That Actually Work

    Natural doesn’t mean ineffective. These DIY gems are backed by tradition and results:

    • Avocado & Honey Mask: Fats + humectants = the ultimate drink for dry hair
    • Apple Cider Vinegar Rinse: Smooths the cuticle, brings back shine, and balances pH
    • Coconut Oil Overnight Treatment: Penetrates deeply to repair lipid layers
    • Rosemary Oil Scalp Massage: Stimulates blood flow and encourages growth

    💡 The Long Game: Repair Takes Time

    Let’s be real—you can’t glue a split end back together. But you can keep it from worsening and give your hair the TLC it needs to grow strong, glossy, and frizz-free. Like skincare, it’s about consistency, choosing ingredients that nourish, and being gentle with your strands.

    So, don’t just fix—heal. 💆‍♀️

    ✨ Let’s Connect!

    If you found these tips helpful, follow us on Instagram, Facebook or Twitter for more clean beauty breakdowns, ingredient spotlights, and personal care realness. 💖

    Got a holy grail remedy that worked for your dry or frizzy hair? Share it in the comments—I love hearing your stories!

  • AM-PM Acne Skincare Routine for All Skin Types


    1. Cleanser
      Start your day with a gentle, pH-balanced cleanser that suits your skin type.
    • For oily or acne-prone skin: Salicylic Acid (deep pore exfoliation)
    • For dry or sensitive skin: Lactic Acid or Green Tea Extract (soothing and mild exfoliation)
    1. Hydrating Toner (Optional)
      Helps rebalance skin and prep it for treatments. Look for:
    • Niacinamide (reduces inflammation and regulates oil)
    • Rose Water or Centella Asiatica (for calming sensitive skin)
    1. Treatment Serum
      Use a lightweight serum to treat acne and strengthen skin barrier. Choose based on skin type:
    • All types: Niacinamide, Azelaic Acid
    • Oily skin: Zinc PCA, Willow Bark Extract
    • Dry skin: Panthenol, Beta-Glucan
    1. Moisturizer
      Hydration is critical to keep your barrier intact. Select accordingly:
    • Oily skin: Gel-based, oil-free moisturizer with Hyaluronic Acid
    • Dry skin: Cream-based with Ceramides and Glycerin
    • Combination: Balancing formula with Squalane
    1. Sunscreen (Non-Negotiable)
      Protects against UV damage and post-acne marks. Look for:
    • Zinc Oxide or Titanium Dioxide (mineral SPF for sensitive or acne-prone skin)
    • Broad-spectrum, non-comedogenic, SPF 30+

    1. Double Cleansing (if wearing SPF/makeup)
      Start with a gentle oil cleanser to break down sunscreen and makeup, followed by a water-based cleanser suited to your skin type.
    2. Exfoliating Toner (2-3x/week)
      Sloughs off dead skin and prevents clogged pores. Choose based on tolerance:
    • Glycolic Acid or Mandelic Acid (AHA for surface exfoliation)
    • Salicylic Acid (BHA for oily, acne-prone skin)
    1. Targeted Treatment or Serum
      Use ingredients that prevent acne and fade scars:
    • All types: Niacinamide, Azelaic Acid
    • Severe acne: Retinol or Retinaldehyde (cell turnover)
    • Inflamed acne: Tea Tree Oil, Centella Asiatica
    1. Spot Treatment (if needed)
      Use only on active pimples:
    • Benzoyl Peroxide (anti-bacterial)
    • Sulfur (absorbs oil, calms inflammation)
    1. Barrier Repair Moisturizer
      Especially important when using strong actives:
    • Ceramides, Squalane, Panthenol
    • Madecassoside or Allantoin (soothing and healing)

    • Avoid touching your face or popping pimples
    • Wash pillowcases and face towels frequently
    • Use clean hands and tools for skincare/makeup
    • Manage stress through regular sleep and exercise
    • Eat a balanced diet low in sugar and dairy (if sensitive)
    • Stick to a consistent routine for at least 6–8 weeks to see visible results

    With patience and the right approach, acne can be managed for all skin types. Focus on ingredients over products, stay consistent, and avoid harsh treatments that can worsen inflammation. A clear complexion starts with a thoughtful, gentle, and ingredient-focused routine.

  • How to Restore Your Skin’s Moisture Barrier After Over-Exfoliation – A Step-by-Step Skincare Recovery Guide

    Let’s talk about something many skincare lovers don’t realize until it’s too late: over-exfoliation. That “glow” we chase with chemical exfoliants can quickly backfire, leaving our skin sensitive, dry, and inflamed. If your skincare routine has left your face feeling tight, red, itchy, or stinging after application, chances are you’ve damaged your skin’s moisture barrier—also known as the acid mantle.

    Don’t panic. The good news? With the right approach and ingredients, you can repair your skin barrier and bring back soft, balanced, and glowing skin. Let’s dive into what your moisture barrier is, why it’s vital, and how to heal it naturally.


    What Is the Moisture Barrier and Why Is It So Important?

    Your moisture barrier is the outermost layer of your skin (the stratum corneum) made up of lipids like ceramides, cholesterol, and fatty acids. Think of it as your skin’s bodyguard—it protects against environmental pollutants, bacteria, and moisture loss, while keeping hydration locked in.

    When healthy, this barrier maintains a slightly acidic pH level between 4.2 to 5.6, which prevents bad bacteria from thriving. But when it’s compromised, your skin is exposed and vulnerable to dryness, redness, sensitivity, and even breakouts.


    Signs You’ve Damaged Your Skin Barrier

    Here’s how to know if your acid mantle is damaged:

    • Redness or irritation from even gentle products
    • Itchy, flaky, or tight skin
    • Increased sensitivity or burning sensations
    • Stinging when applying serums or moisturizers
    • Unusual breakouts or inflamed skin
    • A “shiny yet dry” appearance

    Common culprits? Over-exfoliating with AHAs (like glycolic or lactic acid), BHAs (like salicylic acid), harsh soaps, or high-foaming cleansers containing sodium lauryl sulfate (SLS).


    Step-by-Step Guide to Repair Your Moisture Barrier

    1. Stop All Exfoliation—Immediately

    No chemical exfoliants, no scrubs, no peels—none of it. Your skin needs time to rebuild and strengthen. This break could last from two weeks to over a month, depending on how damaged your barrier is.


    2. Switch to a Gentle, pH-Balanced Cleanser

    Avoid anything that foams heavily or contains SLS or alcohols. Opt for a low-pH cleanser that’s hydrating and non-stripping. Look for ingredients like:

    • Glycerin: A humectant that draws moisture to the skin.
    • Ceramides: Replenish the lipids lost during over-exfoliation.
    • Fatty acids: Help repair the barrier structure.

    3. Hydrate with a Soothing Toner or Essence

    After cleansing, apply a hydrating toner that calms inflammation and helps retain moisture. Key ingredients to look for:

    • Hyaluronic Acid: Binds water to the skin, plumping and hydrating deeply.
    • Aloe Vera: Soothes irritation and redness.
    • Beta-Glucan: A powerful anti-inflammatory agent that promotes healing.
    • Panthenol (Vitamin B5): Supports skin regeneration and softness.

    4. Use Barrier-Strengthening Serums

    You don’t need to skip serums—just choose the right ones. Avoid strong actives and instead focus on calming, nourishing formulas with:

    • Niacinamide (Vitamin B3): Reduces inflammation, regulates oil production, and supports barrier repair.
    • Centella Asiatica (Cica): Speeds up healing and calms redness.
    • Squalane: Mimics the skin’s natural oils, providing non-comedogenic hydration.
    • Fermented ingredients (e.g., bifida ferment lysate): Help strengthen the skin’s microbiome and improve hydration.

    5. Seal It In with a Rich Moisturizer

    Your moisturizer is the hero product in your healing routine. Look for one that is rich in:

    • Ceramides: Rebuild and fortify the barrier.
    • Cholesterol: Helps maintain elasticity and skin health.
    • Fatty Acids (like linoleic acid): Support cell regeneration and hydration.
    • Shea Butter or Jojoba Oil: Deeply moisturizing and soothing.

    6. Don’t Skip Sunscreen (Ever)

    Daily sunscreen is non-negotiable. A compromised barrier is extra sensitive to UV rays, which can worsen damage. Use a broad-spectrum SPF 30 or higher, and choose a mineral sunscreen (with zinc oxide or titanium dioxide) if your skin is feeling extra sensitive.


    Pro Tips for Accelerated Skin Barrier Recovery:

    • Avoid hot water—wash with lukewarm water to prevent further irritation.
    • Skip unnecessary steps—less is more. Stick to a simple cleanse, tone, moisturize, SPF routine.
    • Humidifiers can help if your environment is dry.
    • Stay hydrated—what you put inside your body matters too.
    • Consider occlusives like petrolatum or lanolin at night to lock in moisture (if your skin tolerates them).

    Final Thoughts: Listen to Your Skin

    Healing a damaged skin barrier requires patience, consistency, and gentle care. Don’t rush it, and remember: skincare is not one-size-fits-all. What works for someone else might not work for you. Your skin knows what it needs—pay attention to its signals.

    By focusing on barrier-repairing ingredients, avoiding common irritants, and scaling back on exfoliation, you’ll be on your way to restoring a radiant, calm, and healthy complexion.

  • When Beauty Turns Toxic: What’s Hiding in Your Products? 🧴🚫

    Recently, several beauty and personal care products have been recalled due to the presence of hazardous ingredients. Some acne treatments and hair styling products were found some substances linked to hormone disruption and reproductive harm and more. These recalls were initiated following safety concerns uncovered. Consumers are advised to discontinue use and check for lot numbers or expiration dates to ensure product safety.

    When it comes to beauty, we all want products that not only make us look good but also keep us safe. But a recent analysis has dropped a truth bomb on the industry, revealing that 60% of over 4,000 beauty products marketed toward consumers contain at least one moderately hazardous ingredient—and most contain multiple. 😱 This isn’t just an isolated issue—it’s part of a much bigger, systemic problem that’s putting our health at risk every single day.
    What’s Really Inside Your Products?

    Many of the ingredients in everyday beauty staples—like hair straighteners, skin-lightening creams, and conditioners—carry moderate to high health risks. Formaldehyde, for example, is a known hormone disruptor used to preserve bodies (yes, embalming fluid!), but it’s also found in some hair products.
    Another danger? Quats, often found in conditioners, are linked to reproductive harm and more. Then there’s isothiazolinones, preservatives that can damage your respiratory system.
    The most alarming of all? Products that list “fragrance” on the label—a vague, catch-all term for thousands of chemicals, many with severe health risks, including hormone disruption, fertility issues and more. One specific fragrance compound, lilial, is banned in the EU for its fertility-harming properties.


    Why This Matters 🧬
    Repeated exposure to these toxins may contribute to higher rates of hormone imbalance, reproductive issues, Eczema, Psoriasis and more especially among marginalized groups who are disproportionately marketed these products. The real danger is in daily use—the cumulative effect of layering multiple products laced with hazardous chemicals builds up over time, increasing health risks.

    Any Progress at All?
    There’s a sliver of good news: eight of the nine most dangerous ingredients flagged in a 2016 study have declined in use, including a 6% drop in parabens—a common preservative linked to reproductive harm. But progress is painfully slow, and the beauty industry continues to fall short in protecting consumers.
    Some countries are stepping up with laws banning toxic ingredients, forcing brands to rethink their formulations. Since companies can’t easily produce different formulas for different regions, this creates pressure for national reform—and that could be a game changer.
    Benefits of Going Clean 🧴✨

    Reduce health risks like hormone disruption, respiratory issues, and reproductive harm.
    Your skin and hair thrive with gentler, natural ingredients.
    Feel good knowing you’re supporting ethical and sustainable brands.
    But Let’s Be Real… Drawbacks Exist Too 😓
    Non-toxic products can be more expensive.
    Natural alternatives sometimes don’t perform the same.

    Learn to Decode labels of Products
    Decoding labels is hard—“fragrance” hides a chemical cocktail, and not all brands disclose everything.
    How to Stay Safe 💡
    To keep yourself safe from harmful beauty products, follow these essential steps:

    Stay Informed
    Follow regulatory updates and support safer beauty standards by voicing concerns to brands and lawmakers. Your choices help shift the industry toward safer formulations.

    Read Ingredient Labels Carefully
    Avoid products with vague terms like “fragrance” or known harmful ingredients such as parabens, formaldehyde-releasing agents, phthalates, quats, and benzene.

    Use Trusted Safety Databases
    Before buying, check products on platforms like the bdazlai Ingredient Database and other for safety ratings and ingredient breakdowns.

    Choose Fragrance-Free or Transparent Brands
    Opt for fragrance-free or brands that fully disclose ingredient sources, especially for sensitive skin or daily-use items.

    Start Transitioning to Clean Beauty
    Gradually switch to non-toxic, clean beauty products that use gentle, plant-based ingredients and avoid harmful chemicals.

    Bonus Tip 💡
    Patch test new products to check for allergic reactions, especially if you have sensitive skin or pre-existing conditions.
    Your health is worth protecting—glow safely, not hazardously. ✨💬 Let’s Talk! Have you made the switch to clean beauty? What’s been your experience with product safety? Drop your thoughts, faves, or horror stories in the comments—we’re in this together.
    📲 Follow for More: Stay updated on beauty, wellness, and personal care tips by following us on [Instagram]. Let’s glow safely and authentically, together. 💖

  • How to Safely Do an At-Home Chemical Peel

    Everything You Need to Know for Radiant, Healthy Skin
    Chemical peels have been used for decades to enhance skin texture, fade hyperpigmentation, and promote cell renewal. While professional treatments can deliver dramatic results, at-home peels offer a convenient and budget-friendly alternative—if done correctly. However, using them improperly can lead to irritation, burns, and long-term skin damage.

    If you’re considering an at-home chemical peel, here’s everything you need to know to get all the benefits without the burn.

    What Is a Chemical Peel?
    A chemical peel is a treatment that exfoliates the skin by using acids to dissolve dead skin cells, revealing a brighter, smoother complexion. Unlike physical exfoliants, which use scrubs or brushes to remove dead skin, chemical peels work by loosening the bonds between skin cells, allowing them to shed naturally.

    Common Acids Used in Chemical Peels
    Different acids target different skin concerns. Here’s a simple guide to choosing the right one for your skin type:
    For Acne-Prone Skin → Look for beta hydroxy acids (BHAs) like salicylic acid that penetrate deep into pores and help prevent breakouts.
    For Hyperpigmentation & Scarring → Alpha hydroxy acids (AHAs) such as glycolic acid help fade dark spots and acne scars by increasing skin turnover.
    For Fine Lines & Wrinkles → Lactic acid works to hydrate the skin while encouraging collagen production, improving elasticity.
    For Uneven Texture & Dullness → Mandelic acid is a gentler exfoliant that smooths skin texture and brightens dull complexions.
    It’s important to note that higher acid concentrations do not mean better results. More isn’t always better—sometimes, it’s riskier.

    Choosing the Right At-Home Peel Format
    At-home peels come in various formats, and choosing the right one depends on your comfort level and skin sensitivity.
    Peel Pads – Easy to use and mess-free, these are ideal for beginners and sensitive skin types.
    Overnight Serums – Designed for gradual exfoliation, perfect for those looking for slow, steady improvement.
    Toners & Peeling Solutions – These typically contain higher acid concentrations for deeper exfoliation, recommended for those with experience using acids.
    Multistep Kits – These offer a complete system, often including neutralizers or hydrating post-peel treatments.

    How to Safely Use an At-Home Peel
    ✅ 1. Perform a Patch Test
    Before applying any peel to your face, test it behind your ear or on your wrist. This helps prevent unexpected reactions.
    ✅ 2. Start with Clean, Dry Skin
    Wash your face with a gentle cleanser and pat dry before applying the peel. Avoid using any scrubs or exfoliants beforehand.
    ✅ 3. Apply the Peel Carefully
    Follow the instructions and apply a thin, even layer, avoiding sensitive areas like the eyes, lips, and nostrils.
    ✅ 4. Follow the Recommended Time Limit
    Leaving a peel on for too long won’t increase its effectiveness—it will only increase irritation and peeling. Stick to the recommended time.
    ✅ 5. Hydrate & Soothe Your Skin
    After a peel, apply a hydrating serum or moisturizer with ingredients like hyaluronic acid, ceramides, or aloe vera to help calm the skin.
    ✅ 6. Always Use Sunscreen
    Chemical peels make your skin more sensitive to UV rays, so wearing broad-spectrum sunscreen (SPF 30 or higher) daily is non-negotiable.
    What to Avoid When Using a Chemical Peel

    🚫 Physical Exfoliants & Scrubs – Using scrubs on the same day as a peel can lead to over-exfoliation and irritation.
    🚫 Retinoids & Strong Actives – Retinol, tretinoin, or strong vitamin C serums can increase skin sensitivity, leading to redness and flaking.
    🚫 Benzoyl Peroxide & Acne Treatments – Combining peels with these ingredients can cause excessive dryness and peeling.
    If you experience severe redness, burning, or prolonged irritation, stop using the product immediately and allow your skin to recover before trying another exfoliating treatment.

    Which Peels Should You Avoid Using at Home?
    Not all chemical peels are safe for at-home use. The FDA has issued warnings about certain products containing extremely high acid concentrations, which can cause chemical burns, deep tissue damage, and permanent scarring.

    Avoid Peels That Contain:
    TCA (Trichloroacetic Acid) over 10% – High concentrations should only be used by professionals.
    Glycolic Acid above 30% – Can cause severe irritation and burns.
    Lactic Acid above 10% – Excessive strength can disrupt the skin barrier.
    100% Pure Acids – These are meant for professional use only and should never be applied at home.

    For the safest results, always follow concentration guidelines and opt for reputable products with clearly labeled percentages.

    Final Thoughts: Smart, Safe, and Effective Peeling
    At-home chemical peels can be an amazing addition to your skincare routine when used responsibly. They help with exfoliation, acne, hyperpigmentation, and fine lines—but they must be used correctly to avoid damage.
    ✔ Start slow and listen to your skin.
    ✔ Use hydrating and barrier-repair products after your peel.
    ✔ Wear SPF daily to protect your new skin.
    With the right approach, an at-home peel can help you achieve smooth, radiant skin—without irritation or risks.
    Would you like more expert guidance on choosing the right skincare for your needs? Let AI-powered personalization help you make safe, effective beauty choices tailored just for you.

    🌿 Because great skin starts with great decisions! 💖

  • How to Identify Your Hair Type and Suitable Hair Care🧐

    Hair type is based on texture, thickness, and oil production. Here’s a quick guide:
    🔹 Fine Hair – Thin, delicate strands that often appear flat and get oily quickly.
    🔹 Thick Hair – Denser strands that can feel heavy and require more hydration.
    🔹 Curly Hair – Forms natural waves or curls, prone to dryness and frizz.
    🔹 Oily Hair – Produces excess oil, leading to greasy roots.
    🔹 Dry or Damaged Hair – Lacks moisture, often from heat styling, coloring, or environmental factors.


    How to Choose the Right Shampoo, Conditioner & Hair Mask 🧴


    For Fine Hair 🌬️
    Shampoo: Look for volumizing and lightweight formulas. Avoid heavy oils and silicones that can weigh down your hair.
    Conditioner: Use a lightweight, detangling formula, focusing only on the ends to prevent greasiness.
    Hair Mask: Choose protein-based masks to strengthen strands without making them limp. Apply once a week.
    Best Ingredients: Biotin, keratin, panthenol, rice protein.
    Avoid: Heavy oils like coconut oil, silicones, sulfates.


    For Thick Hair 💪
    Shampoo: Use moisturizing and smoothing shampoos to control frizz and nourish your hair.
    Conditioner: A deeply hydrating conditioner will help soften and manage your hair.
    Hair Mask: Creamy, rich masks with butters and oils work well to hydrate thick hair. Use 1–2 times a week.
    Best Ingredients: Shea butter, argan oil, glycerin, keratin.
    Avoid: Lightweight shampoos (they may not provide enough moisture).


    For Curly Hair 🌊
    Shampoo: Opt for sulfate-free, hydrating shampoos that won’t strip natural oils.
    Conditioner: A rich, creamy conditioner with slip helps detangle and define curls.
    Hair Mask: Look for intensive hydration masks with butters and oils to keep curls soft and bouncy.
    Best Ingredients: Coconut oil, avocado oil, aloe vera, honey.
    Avoid: Sulfates, alcohol-based products that dry out curls.


    For Oily Hair 💦
    Shampoo: Use a clarifying shampoo to remove excess oil without over-drying.
    Conditioner: Apply a light conditioner only on the ends to avoid buildup.
    Hair Mask: Use a scalp-purifying mask with clay or charcoal once a week to control oil.
    Best Ingredients: Tea tree oil, witch hazel, charcoal, peppermint.
    Avoid: Heavy oils, thick creamy formulas.


    For Dry/Damaged Hair 🔥
    Shampoo: Use moisture-rich, sulfate-free shampoos to prevent further damage.
    Conditioner: Deep conditioning is a must! Look for protein and oil-infused formulas.
    Hair Mask: Repairing masks with keratin and oils help restore strength. Use 1–2 times weekly.
    Best Ingredients: Argan oil, keratin, castor oil, collagen.
    Avoid: Sulfates, drying alcohols, excessive heat styling.

    Final Thoughts 💡
    Finding the right products for your hair type can make a huge difference in hydration, strength, and manageability. No more guessing—tailor your routine and let your hair thrive!

    What’s your hair type, and which products have worked best for you? Share in the comments! Don’t forget to follow us for more haircare tips. ✨💆‍♀️💖